Anniversary card

4
com
Hi,

Very quick post for today. Just wanna share my card for a friend of mine.

Sweet Kind Wonderful

1
com
Hi,


Just a quick posting for today. I have another "homework" to do. My boss assigned me to prepare some contents for his new website. Oh no... I cannot enjoy the holiday. Ya we are having holiday here. 


I created a simple card few days ago.
I just used Pink Paislee Butterfly Garden cut, yellow card stock cut with Spellbinder, cabochon, flowers, beads and buttons as my focal.
I used twine to balance the look.


Here is my card


Entering:
Simon Says Stamps Challenge - Buttons


Thanks for stopping by,

Noddy Rainey

Kitchen Queen's Envelobox

1
com
Hi friends,

I forgot to share the envelope for Kitchen Queen card.


This is not ordinary A2 card.
My card is 5" x6.5" so I need to make my own envelope to fit the card.

Thanks to Mr. Scor-Pal for helping me to make this box.


I recycle die cut paper which I made for inside page.
Did you notice the die cut paper? I distressed the edge with antique linen and tea dye.
Inside page

Then, I make a medallion and top with the 1" circle sentiment.


Actually, I wanted to make a ruffle paper for the card. But, I have a lack knowledge to make ruffle paper, maybe I need to learn more from Clare. I replaced the idea with lace ribbon.

Later, I came with medallion idea for the envelobox.


Entering 

Kitchen Queen Card to those who loves to cook

5
com
Hi friends,

Who love to cook??? I'm so sure that many of us like to cook. 
Recently, I was requested by a friend of mine to make a card for her sister who loves to cook and architecture.

So, kitchen & architecture???? Hmmm... The combination really challenging for me. But, I'll do my best.

At the time I was thinking of retro images. Ting Ting ... lamp came out and say "Kitchen  Time". Hehehehe..

I tried to combined soft color and some die cuts to look as an architecture. 

I used Heartwarming Vintage Collection - Kitchen Time Vintage Cuts (Kitchen Queen) which I think that suit with the theme.

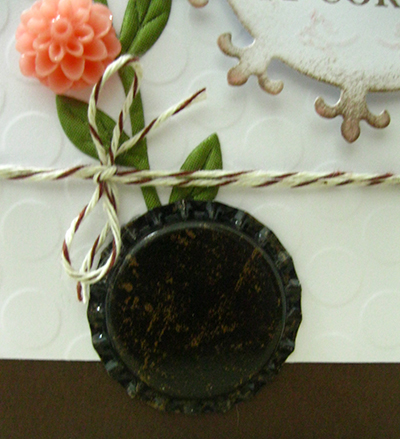
I cut the PTI die & Spellbinder die cut and stamped the message. Then, I added ribbons attached with a flower.

And here is the card,

Click to enlarge the image.

Inside the card

I really hope that this card suit her need.


Supplies:
cardstock - PTI
Pattern Paper - Cosmo Cricket
Stamp - PTI (mega mixed messages)
Seam Binding - Ribbon Carousel
Lace ribbon - Hero Arts
Flower - local shop
Tools : PTI-Jar die, Spellbinder-Level 18

Entering
RCC
MAWTT


Thanks for stopping by,
Noddy Rainey

Glad You're In My Corner

5
com
Hi,

Yesterday I managed to surf the card challenge blogs.
The challenges is very interesting to do. I have not joined any challenge for weeks.
My soul can not wait to make a card with a given theme.

So last night after my son go to sleep, I took the opportunity to create a card.
I got the inspiration on the way back to home from the office.

I am impressed with the color combinations available in Embellish Magazine Challenge. Sweet colors to me.

Here is my card,


This card is simple. I only use two Cabochon flowers and leaf ribbon from Flourishes.
I purposely tilted the leaf. Then, I twisted the twine ribbon twice.


Finally I cut white card stock with Spellbinder-Fleur De Lis and distressed with Memento Rich Cocoa.

Noticed or not, I used bottle cap to make a pot?


I intended to use the cap because I have a lot of bottle caps at home.
Just want to make something different from the others that I had made ​​earlier.

Ohya .. This card is also suitable for Flourishes-Metal Challenge.


This card entering:

Embellish Magazine Challenge

Flourishes-Heavr Metal Challenge


Thank you for stopping by,
NoddyRainey

It was cookies box.

1
com
Hi friends,

Last week a friend of mine want to trow away sample cookies cointainer. But, I asked her to give all the cointainer to me. Actually, she got it for free, her friend gave to her to promote the cookies at the office.

The cointainer a bit expensive if I want to buy at the shop. I took the opportunity to have all the cointainers.

YES! she agreed.

Proudly, I'm a breastfeed mom. I am a nursing mother to a 15 months old and I love it.

I'm taking S-26 milk as a supplement to help me producing enough milk to my baby.
So, I need to take along the milk with me to the office everyday. (^_^).

As I told before I got cookies container from a friend, I decided to altered the cointainer to keep my milk. 

I just wrapped the cointainer with wrapper paper, die cut the dark green paper with PTI eyelet and glued around. On the top I just glued frame paper which I bought from Etsy.
I stamped the Hot Coco Mix (from PTI). Lastly, I tied a wired ribbon around the cointaner. 

TADAA...


Get inpired #2

0
com
Hi Ladies,

I have another card that I made someday ago.

Another card that I made using other's creation. I was inspired with this masculine card by Nerina using PTI's stuffs. Nerina is so creative. What I most like in this card are she stamped multiple layer images and combination polka dot ribbon. For me, polka dots are girly pattern. What do you think about polka dots?

What a gorgous card!
Here is my card,
I don't have woodgrain stamps but I do have woodgrain impression plate. I pressed the white paper and then painted with Tim Holtz distress ink, Tea Dye and Antique Linen.

I also do not have PTI's turning new leaf stamps and dies. But, I found this pattern paper. I cut the leaves and distressed the edge.

Then, I colored the border with this copic marker.

What do you think about my card?

Get inpired #1

0
com
Hello,

For today, I just wanted to share a card which I made somewhere in end August.

A friend of mine just delivered baby girl. After 2 boys, she finally blessed with a girl.
So I wanted to send her a card to congrat her new baby.

  I was inpired by this card,it is so sweet + girly look.


Here is my card,
closed pic


Inside

I send this card with same pattern headband but I forgot to resize the pic. I will upload it later.

1000 sheets blog candy

0
com
Hi friends,

I would like to share with you a good news from Amy she giving away 1000 sheet of 6x6 pattern paper.

I think this is amazing and we can find people like her once in the blue moon.


The best part is, when she decided to divide this paper into five. 
So, 5 people had a chance to win this paper plus cute stamp. 
Ooooo how kind she is.


Let see the 5 prizes.

I this like music sheet.
This stamp is so cute!
What can I say, absolutely ngam hoo
Perfect pair.
I wish I wish I could win this!!! Amy please choose me.

Pixie Dust Paperie

1
com
 I just read Viola Mahr's blog and just fall in love with the card she made. So lovely!


She made the card by using Pixie Dust Paperie's September kit........ Tecolote.  
Tecolote? Hmm what a unique name to me. After I read more about the kit, I totally agree with Viola, the September kit are huge and so many thing can be done by purchased this kit. I counted 26 items in the kit. Correct me if I'm wrong. Lalalala....


You can pre-order the kit right now or wait till its full reveal on September 5th.

Sweet news from Pixie's blog is their having a Give Away (GA).
I loves to enter Pixie's GA, the prize look awesome to me.


Hopefully I will win this funcky kit.


You are so sweet,

2
com
Hi,

I know I know, I took a long time to update this blog.

With too much work and racing against time to finish before the Dateline arrived, I had to forget this crafting hobby for a moment.

But, I still keep track of and loyal to buy new stamp collections on the market
despite not knowing when I use it. LOL.

2 months ago I bought an amazing stamp of the WMS, Dainty Doilies.
And, last Saturday I was very impressed with the sketch at the Waltzing Mouse Sketch Challenge.

I combined this sketch with Embellish Magazine - Coloring Color Trends Challenge.


+


=


I'm using PTI cardstock as the base. I wanted Bitty Box paper to match this design. But, I don't have any. I also don't have any stamps that have that pattern. Guess where did I got it? Its from K&Co Die cut based paper. Hahaha..  See below pic. Did you notice it?

For the top of the card, I'm using scrap straw mat cut with Spellbinder Label 18. Then, I stamped the sentiment, cut and glued.

I stamped Dainty Doilies in 3 layers. Combining yellow & pink color at the bottom and top layer, I just using yellow pigment ink. I'm glued yellow rose at the center to give more Pop. For the leaves, its from K&Co Handmade Corner Sticker.

And done!

Thank you for stopping by. Please feel free to send me any comments. Feedback is always nice.

NoddyRainey.

Congratulation to Corinna

0
com
HI,

I just read about good news from Corinna mail. She getting married. Hoooray! Congratulation to her.
I knew about Corinna when I started join The Ribbon Carousel Challenge.

The big date is August 5th, SOOOOO she thought she would do a big 'ol Blog Candy giveaway!


I hope I can win the this amazing Ribbon Carousel.

HAPPY ANNIVERSARY

2
com
Hello friends,

I am back after a long silence.

I am very busy as a bee. But over time I did not write here, I received a lot of packages. New stamps, new Ribbons and a new dies.

With the demands of work that requires a strong commitment makes me have to keep a lot of ideas.

2 days ago I get a call from a friend. He was searching for anniversary card. Addicted to make a card. So after work I asked my husband to go straight to second home (all equipment is stored here). Starting from 10 pm to 1 am, finally I can go get 2 cards in one night.


Supply:

Design 1
Cardstock : Kraft & Scarlet Jewel from PTI, recycle Corrugated paper.
Stamp: Mega Mixed Messages from PTI
Ribbon: Local store
Frame: Tattered Angel
Flower: Cabochon flower from local store


Design 2
Cardstock : Kraft & Dark Chocolate from PTI
Pattern paper : MME
Stamp: Say it with Stylefrom WMS
Ribbon: Seam binding from Ribbon Carousel

Button: from local store
Tool : Spellbinder


Please give me a comment about above cards.

xxx Love xxx
Noddy

Happy Bithday to you.... hppy birthday to you...

2
com
Hello blog friends,

I'm so sorry for my silent. I really busy with my daytime job even tomorrow I need to travel to meet my clients.

But, I still need some fresh air and read my favorite blog to release my tension. 

I knew that RibbonCarousel having a music sheet challenge. 
Thanks God, I got another card which not enter any challenge yet. 

"Happy birthday to you... Happy birthday to you...Happy birthday to you"
The most popular song in the world!

Click for larger image

What I love about this card is the ribbon. I fell in love with this music ribbon (I brought this from Etsy). 

For those who are following my blog, I'm pretty sure you must have seen this card from here


I need to pack my stuffs, outstation tomorrow for 2 days.  

Bye,
Noddy

Make it Monday with Kraft Outlet: Clean and Simple Challenge

1
com
Hi everyone,

Today I would like to share with you my CAS card. Believe me, this is very very simple card that I've made.


First, I trimmed 5" x 6.5" kraft pattern paper from Scenic Route. I cut balance of the paper with PTI Mat Stack 4 die. Stamped with WMS Say it with Style. Then, I pressed the  paper with PTI impression plates Wood-grain. I distress the border and put pink buttons tied with Baker's Twine.  Done! Its so simple, right?

Thank you for visit my blog, 
Noddy

RCC #2

7
com
Hello Blog friends,

I would like to share a vintage style card. I made this card for a friend of mine who wanted to give this card to his lovely wife(ooo... so romantic).

Hope he loved this card.

Then, I using this card to enter RCC #2.


That all for today, see you soon.
Noddy

Thank you Teacher...

0
com
Hello Bleeps,

Last week a friend of mine, requested to me to make a boy style Teacher's Day card.
I free myself last weekend to full-filled her requested.

Boy style? I'm thinking of red, blue and brown color which synonym with masculine image. So, here come the card...
Card #1
I stamped kraft cardstock using School Time from PTI's stamp with Versamark to make as a background. Then, layer with MME pattern paper. On the red cardstock, I stamped with Half Pint Heroes from WMS. Lastly, I pop the space cadet image colored with copic and pencil color.

While making the cards I suddenly remember my favorite teacher, ooh... how I missing her so much! Then I came out with this feminine card.
card #2

Thanks for visit me,
Noddy

Ribbon Storage System by Ribbon Carousel

3
com
Hi blog friends,

Today, while I'm blog walking I found something interesting. Actually, I'm so impressed with an amazing ribbon storage system called the “Ribbon Carousel”. If you have many spool of ribbons you should try this storage. 

They called Ribbon Carousel© because it looks like a carousel AND it spins around like a carousel!
4 post RC


Currently, they have 4 post Ribbon Carousel ($64.95) and 8 post coming soon. At less than 4 lbs, you can load a Ribbon Carousel© up and take it with you to any crop, workshop, quilting bee, etc. Each Ribbon Carousel 6.85" square and 13.5" tall (holds up to 96 rolls of 3/8" ribbon).

How interesting ya, and more important is, save more space in your craft room right?


In celebration of this, they are embarking on their first challenge. Ribbon Carousel Challenge #1 (RCC1).


I used a Happy Birthday Card to enter.

Here is my card.

Thanks for stopped by,
Noddy

Happy Mother's Day

2
com
Hello peeps,

I'm so excited last weekend. You know why?? I made a card for Mother's Day. I'm sure all of you like me haa.

Card No.1
 This is simple card, I cut pattern paper from PTI and combined with green cardstock to make like window effect. Then I stamped 3 images, Apron, Flower and bubble... that all what a mother always do for us cooking, washing and always bloom our heart with their advises and loves ...

Card No.2
 My second card is bright color. I'm using yellow and green as a basic color. I love Sweetness paper from Pink Paislee... Most of us like them too.. and for the frame from Tattered Angel, I just dabbed with yellow, green and pink pigment ink.

Card No.3
I love this card! blue color combined with roses.. ooooohhhh... make my heart blooms. I don't want to make this card look so heavy, so I just put the frame and stitched at header and footer of the card. Can you notice the double layer at my sentiment? I always make that mistake... how to avoid this? Anyone can help me?